This post may contain affiliate links. Read my disclosure page here.

Skip the price at the grocery store and learn how to grow broccoli sprouts at home! Right on your kitchen counter is the perfect place to grow these little peppery sprouts. Use this step-by-step guide to get started growing your own superfood.

Save This Recipe
Enter your email and we’ll send the recipe directly to you!
By submitting this form, you consent to receive emails from Delicious Meets Healthy.
Table of Contents
- Why You Will Love These Home-Grown Broccoli Sprouts
- What You’ll Need
- How To Grow Broccoli Sprouts
- Broccoli Sprouts Growing Stages
- Expert Tips From The Test Kitchen
- How To Use Broccoli Sprouts
- Storing Sprouts
- Recipe FAQs
- More Better Than Store-bought Recipes
- How To Grow Broccoli Sprouts (Step-By-Step Guide) Recipe
If you’ve ever wanted to grow your own fresh, crunchy broccoli sprouts at home, you’re in the right place! I’ve been sprouting these tiny greens for the past two years, and let me tell you – they’re a total game-changer. I love tossing them into my daily salads for that extra bit of crunch and flavor. The best part? They’re ridiculously easy to grow, even if you don’t have a green thumb!
Even if your kitchen skills are basic, you can learn how to grow broccoli sprouts at home. The process is super simple, and you only need three main ingredients to get started.
For more easy cooking tips, check out these: How To Cook Quinoa and How To Cut Ginger.

Why You Will Love These Home-Grown Broccoli Sprouts
- Affordable: Growing your own sprouts is a more affordable option than buying store-bought.
- Fresh: Some sprouts will sit at the grocery store for a few days before you grab them. Growing your own ensures you always have fresh ones to enjoy.
- Delicious: Add them to salads, sandwiches, smoothies, or even as a garnish for extra crunch and flavor.
What You’ll Need
For a full ingredients list with measurements, check the recipe card below.

- Broccoli sprouting seeds: I usually use this organic non-GMO sprouting seeds. If you already have broccoli seeds in your pantry, make sure they’re fresh and haven’t been sitting for ages. You need only a couple of tablespoons of broccoli seeds per jar.
- Glass mason jar: You need a wide-mouth jar in which to grow the sprouts.
- Sprouting lid: This is like a strainer that goes on top of your jar. If the mesh lid is not in the budget right now, you can use cheesecloth with a rubber band instead. (My sprouting lid is not available anymore but you can also get this sprouting kit which includes 2 wide mouth jars, sprouting lids, and the stainless steel stand.)
How To Grow Broccoli Sprouts

- Prepare the seeds: Place your seeds in the mason jar and cover them with water. Secure the sprouting lid and let them soak overnight.

- Rinse them. Once soaked, drain the water, and rinse the seeds with fresh water before draining them one more time.

- Start sprouting. Keep the jar upside down or at an angle with the lid side down at room temperature in a cool place to allow excess water to drain. The seeds will start sprouting.
- Rinse daily. A couple times a day, rinse the seeds until they’re ready to harvest.

- Let them grow. Within 3-5 days you’ll notice green sprouts. You’ll want to move the jar into indirect sunlight for a couple of hours per day.

- Harvest the sprouts. When the sprouts are about 2-3 inches long and have leaves you can enjoy them. Add them to a large bowl with water and remove the seed hulls that float on top. Transfer the sprouts to a paper towel lined baking sheet to drain a little bit. Store the raw broccoli sprouts in an airtight container in the refrigerator for up to a week.

Broccoli Sprouts Growing Stages

Day 1. Broccoli sprouts start as tiny brown seeds that swell after soaking.

Day 2. White root tails emerge.

Day 3. Pale shoots begin to grow.

Day 4. Tiny leaves (cotyledons) start unfolding, though they remain yellow until exposed to light.

Day 5. The sprouts stretch taller, and their leaves turn green. Over the next couple of days, they become fuller and more vibrant, reaching about 2–3 inches in height.

Day 6. They’re crisp, green, and ready to harvest!
TIPS FROM NELI’S KITCHEN
Expert Tips From The Test Kitchen
- When rinsing the sprouts daily, you want to ensure that they’re moist but not waterlogged.
- The sprouts do need the sun to grow. However, they don’t like direct sunlight. Make sure to put them in indirect sunlight instead.
- Sprouts should smell fresh when they’re done. If they have a bit of a funky smell to them, it means they got too waterlogged and could have mold. Toss the batch and start again.
- There’s a difference between seeds and sprouting seeds. When setting up, make sure you buy seeds specifically labeled for sprouting.
How To Use Broccoli Sprouts
I love to add sprouts to everything from salads and tacos to grain bowls and omelets. They bring a fresh, slightly nutty, and peppery flavor and a delicious crunch.
- Wraps or Tacos – top your favorite handheld lunches like this Turkey Club Wrap, Salmon Tacos, Shrimp Tacos, or Chicken Tacos.
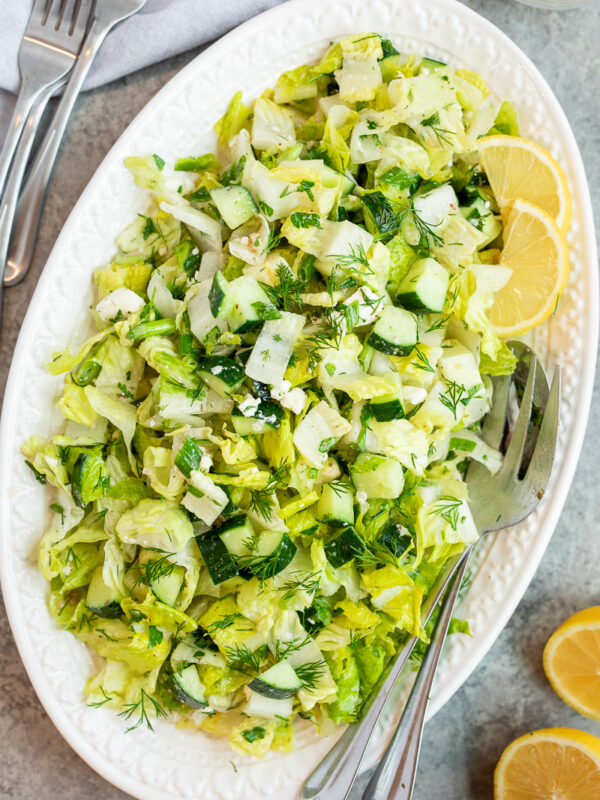
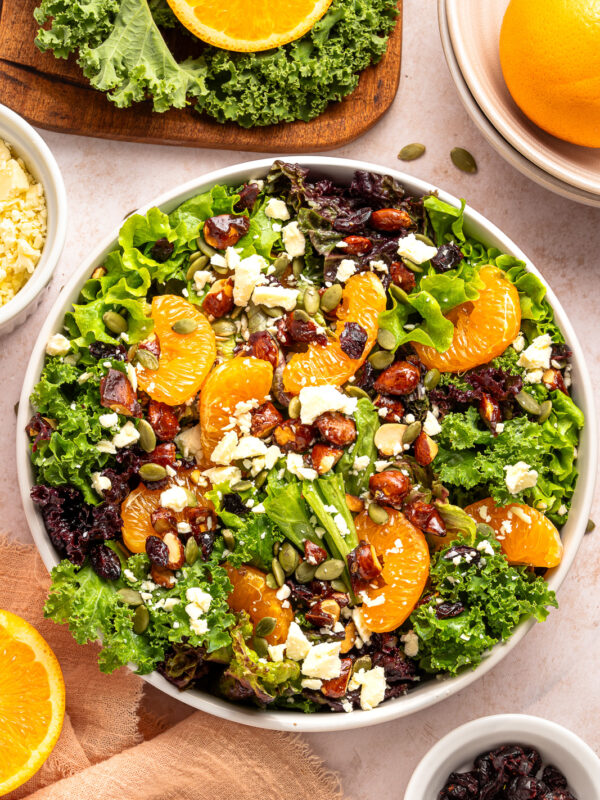
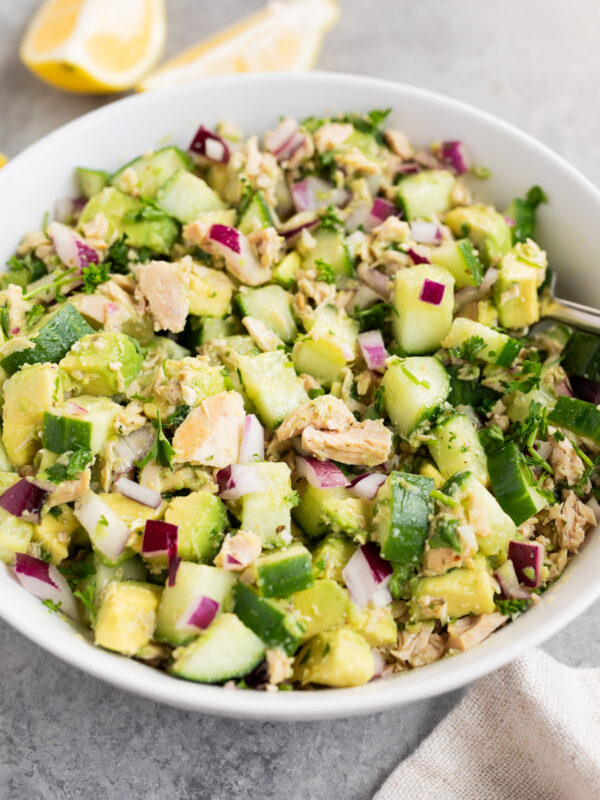
- Salads – Try it with my Chickpea Salad, or Mediterranean Tuna Salad, layer on top of Cobb Salad, or add to this Quinoa Salad with Salmon, or your favorite every day green salad (like I usually do).
- Bowls – it will be the perfect addition to these Salmon Rice Bowls, or the Black Bean Sweet Potato Bowls
- Sandwiches – on Egg Salad Sandwiches, Salmon Salad Sandwiches, or top an Avocado Toast with broccoli sprouts for extra crunch and flavor.
- Stir-Frys – It’s best not to heat the sprouts and I usually add them just before serving on this Beef and Broccoli Stir Fry, Chicken Lettuce Wraps, or Egg Roll in a Bowl.
- Smoothies – add to your favorite Green Smoothie.

Storing Sprouts
Once ready, I store sprouts in the fridge in a jar or sealed glass container. They will stay fresh for 5-7 days.
You can also freeze your sprouts in a freezer-safe bag for up to one month. Use them right from frozen by tossing them into a stir fry of sorts.
Recipe FAQs
Add the sprouted broccoli seeds to a large bowl with water and give them a gentle swirl in the water. This helps to loosen the empty broccoli hulls from the sprouts. Most of the brown seed hulls will float to the top and I just scoop them out with a spoon, and remove any unsprouted seeds. I don’t worry about removing every single hull but I do try to get rid of most of them.
Including the prep work of soaking the seeds, broccoli sprouts take about 4-6 days until they’re ready to eat.
They have a bit of an earthy and nutty taste with a spicy undertone. They’re also slightly crunchy which makes a delicious addition to any kind of salad or wrap.
More Better Than Store-bought Recipes
If you enjoyed this Broccoli Sprouts recipe or any other recipe on my blog, please leave a ⭐ star rating and let me know how it went in the 📝 comments below. Thanks for visiting!
Pin this now to find it later
Pin It
☝ Tap stars to rate
How To Grow Broccoli Sprouts (Step-By-Step Guide)
Save This Recipe
Enter your email and we’ll send the recipe directly to you!
By submitting this form, you consent to receive emails from Delicious Meets Healthy.
Equipment
Ingredients
- 2 Tablespoons broccoli sproting seeds
- ¼ cup water
Instructions
- Prepare & soak the seeds: Place 2 tablespoons of broccoli seeds in your jar and add about 2 cups of water to cover the seeds. Secure the sprouting lid over the jar opening and let the seeds soak in the water for about 8 hours (or overnight).
- Drain and Rinse: After soaking, drain the water through the lid. Rinse the seeds with fresh water and drain again.
- Start Sprouting: Place the jar at an angle, lid-side down, in a bowl or on a stand to allow excess water to drain. Keep it in a cool, dark place (like a cabinet or shaded counter).
- Rinse Daily: Continue to rinse and drain the seeds twice a day (morning and evening) until the sprouts are ready to harvest to keep them moist but not waterlogged.
- Watch Them Grow: After 3-5 days, you’ll see green sprouts. Move the jar to indirect sunlight for a few hours daily to help them develop chlorophyll.
- Harvest: Once the sprouts are about 2-3 inches long and have green leaves, they’re ready to eat! Add them to a large bowl with water and remove the seed hulls that float on top. Remove as many as you can. Transfer the sprouts to a paper towel lined baking sheet to drain a little bit. Store them in an airtight container in the refrigerator for up to a week.
Notes
- When rinsing the sprouts daily, you want to ensure that they’re moist but not waterlogged.
- The sprouts do need the sun to grow. However, they don’t like direct sunlight. Make sure to put them in indirect sunlight instead.
- Sprouts should smell fresh when they’re done. If they have a bit of a funky smell to them, it means they got too waterlogged and could have mold. Toss the batch and start again.
- There’s a difference between seeds and sprouting seeds. When setting up, make sure you buy seeds specifically labeled for sprouting.
Nutrition
Nutrition Disclaimer: Nutritional values are estimates and may vary with ingredients, brands, and portion sizes. For accuracy, use your preferred nutrition calculator.
Disclaimer: The information provided in this recipe is for informational purposes only and should not be considered medical or nutritional advice. I am not a doctor or a dietitian. Always consult a qualified healthcare provider for personalized guidance regarding your diet or health. For more details, please read my full disclosure page.